Workbench moderation works by allowing you to keep a new revision of your content as a draft (or unpublished) while an older revision remains as your published version. Out of the box Drupal handles this beautifully, most of the time. However, once you start adding contributed and/or custom modules, things can start to get hairy.
For example, Path module will generate a new alias each time your node is saved (if you define one in your node’s settings). This is great when the latest revision is your published content, but when the latest revision is a draft, you’ll want the keep the old alias until you publish the draft.
We’re not the first to encounter this problem, and Workbench Path Revision comes to the rescue. It works by bypassing the Path settings when saving a node, and storing the data until you need it when you publish your draft.
I did run into an issue when trying to auto-generate an alias based on Pathauto’s pattern (Pathauto is a contrib module). Workbench Path Revision would always disable the “Generate automatic URL alias” option and never generate an alias. There is a patch in the works.
Where things really start to get complicated is when you want to use views. When you want to display content using views, you generally add a filter to only display published content in order to avoid visitors from seeing content that’s not quite ready yet. This works great. Unless your site uses the following setup…
Our scenario
Imagine a site where you use Panels to make a node’s page a little more configurable. You turn on Panels and create a page that displays your node as a panels page. You can now move around your fields, maybe putting some on the left and others on the right (let your imagination go wild). Your node has an image field, and you turn to Views in order to display it as a slideshow. You add a “Content: Nid” contextual filter (also known as an argument) and configure it to use the “Content ID from URL” to link the view to your particular node. Finally you add this view to your panel page and create a beautiful piece of content with a stunning slideshow. Publish it, and presto! So far so good.
A week later your boss tells you that you need to change the slideshow, but he wants to approve the changes before your site’s visitors are allowed to see them. Since you have Workbench moderation enabled on the site, you simply create a new draft and update the images and save the draft. You look at the draft’s page… but nothing has changed! What’s going on?
Comparing the published version and the draft you don’t see a difference…
So what went wrong?
Your panels and views are oblivious to revisions at this point. They simply take the published revision and display it. So how can you fix it? This is how.
Assumptions
We will assume you site is a default Drupal site with the following additional modules enabled:
- Chaos tools, Page manager, Views content panes
- Panels
- Views, Views UI
- Workbench moderation
The following drush command will get you set up nice and quick:
drush en page_manager panels views_ui views_content workbench_moderation
Getting started

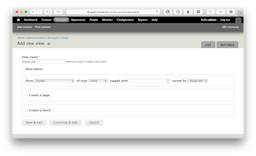
- Go to /admin/structure/views/add to add a new view
- Give it a name, in this case “Simple view”
- Select: Show “Content” of type “Article”
- Deselect the “Create a page” checkbox
- Click on the “Continue & edit” button
- Click on the “+ Add” dropdown and select “Content pane”
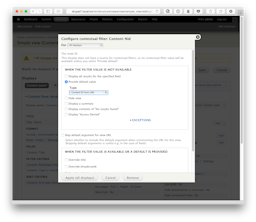
- Add a “Contextual filter” of type “Content: Nid”
- Configure it to “Provide default value” of type “Content ID from URL”
- Apply (all displays)
- Save the view
We’ll now add this view to a panels page that overrides the default Article node view:
- Go to /admin/structure/pages/edit/node_view
- If your “Node template” page is not enabled, enable it
- Now “Add variant”
- Make sure “Variant type” is set to “Panel”
- Check the “Selection rules” and “Contexts” checkboxes
- Click on the “Create variant” button
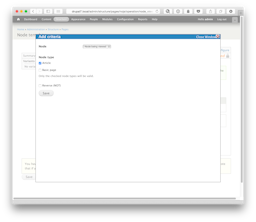
- We are now setting our criteria: select “Node: type” and press the “Add” button
- Check the “Article” checkbox
- Click on the “Save” button
- Click on the “Continue” button
- We are now setting our contexts: our node’s context is already set, nothing to do here
- Click on the “Continue” button
- Choose your layout: we can keep the defaults
- Click on the “Continue” button
- Our default Panel settings are fine too
- Click on the “Continue” button
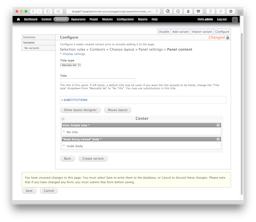
- Now let’s add our view to the panel: use the cog in the “Center” panel to “Add content”
- Select “View panes” on the left
- Select “View: Simple view” (the view pane we created above)
- Click on the “Finish” button
- We’ll add our a body field as well: use the cog in the “Center” panel to “Add content”
- Select “Node” on the left
- Select “Node body”
- Click on the “Finish” button
- Click on the “Create variant” button
- And finally click on the “Save” button
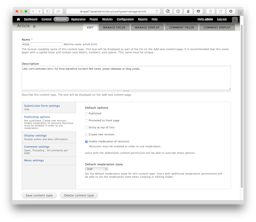
- Go to /admin/structure/types/manage/article
- Under “Publishing options”:
- Uncheck “Published”
- Uncheck “Promoted to front page”
- Check “Create new revision”
- Check “Enable moderation of revisions”
- Make sure “Default moderation state” is set to “Draft”
- Click on the “Save content type” button
We’ll need some content to see what’s going on:
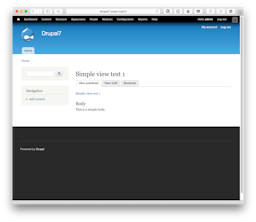
- Go to /node/add/article
- Give it a title: “Simple view test 1”
- Enter some body text: “This is a simple body.”
- Click on the “Save” button
- Click on the “Moderate” tab
- Set moderation state to “Published”
- Click on the “Apply” button
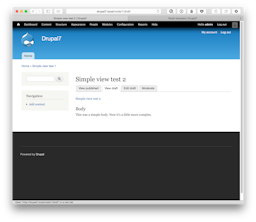
- Click on the “View published” tab to see your published content
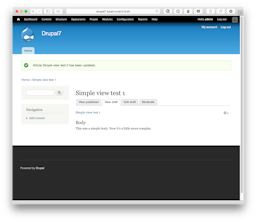
Let’s create a new draft and change our content:
- Click on the “New draft” tab
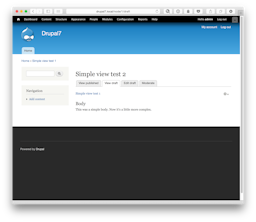
- Change the title to “Simple view test 2”
- Change the body to “This was a simple body. Now it's a little more complex.”
- Click on the “Save” button
The fix
To fix the panel’s page title
- Go to /admin/structure/pages/nojs/operation/node_view
- Click on “Content” on the left side underneath our Panel Variant
- For title enter “%node:title”
- Click on the “Update and save” button
The page’s node title now works correctly when switching between the published revision and the draft. Our view still ned to be fixed, though.
The problem is that our view is based on “Content”. We need to base it on “Content revision”, and so we can’t alter our existing view but need to create a new view.
- Go to /admin/structure/views/add to add a new view
- Give it a name, in this case “Revision view”
- Select: Show “Content revision” of type “Article”
- Deselect the “Create a page” checkbox
- Click on the “Continue & edit” button
- Click on the “+ Add” dropdown and select “Content pane”
- Add a “Contextual filter” of type “Content revision: Vid” (this will allow us to pass in the node’s revision ID instead of the node ID)
- Configure it to “Hide view” when no filter value is available; we’re going to pass in the value through the panel’s config pane since we can’t get it from the URL
- Apply (all displays)
- By default the view includes a “published” filter. We need to remove it in order to display the title for any revision, draft or published: Under “Filter criteria” click on “(Get the actual content from a content revision.) Content: Published (Yes)”
- Click on the “Remove” button
- Let’s also remove the revision date field so only the title remains: Under “Fields” click on “Content revision: Updated date (Updated date)”
- Click on the “Remove” button
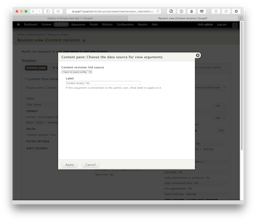
- Under “Pane settings” click on the “Edit” link for “Argument input”
- Change “Content revision: Vid source” to “Input on pane config”
- Click on the “Apply” button
- Save the view
Now that we’re using a new view, we’ll have to replace it on our panels page:
- Go to /admin/structure/pages/nojs/operation/node_view
- Click on “Content” on the left side underneath our Panel Variant
- Use the cog in the “Center” panel to “Add content”
- Select “View panes” on the left
- Select “View: Revision view” (the new view pane we just created above)
- For “Content revision: Vid” enter “%node:vid”; this will pass along the node’s revision ID to the view
- Click on the “Finish” button
- Drag and move the newly added pane “View: Revision view” to just below our “View: Simple view”
- Click on the cog inside the old “View: Simple view” and select “Remove”
- Confirm that you wish to “Remove this pane”
- Click on the “Update and save” button